Blog

  • A Gentle Way to Spend Time Together: Word Searches for Seniors (and the Stories They Unlock)

    A Gentle Way to Spend Time Together: Word Searches for Seniors (and the Stories They Unlock)

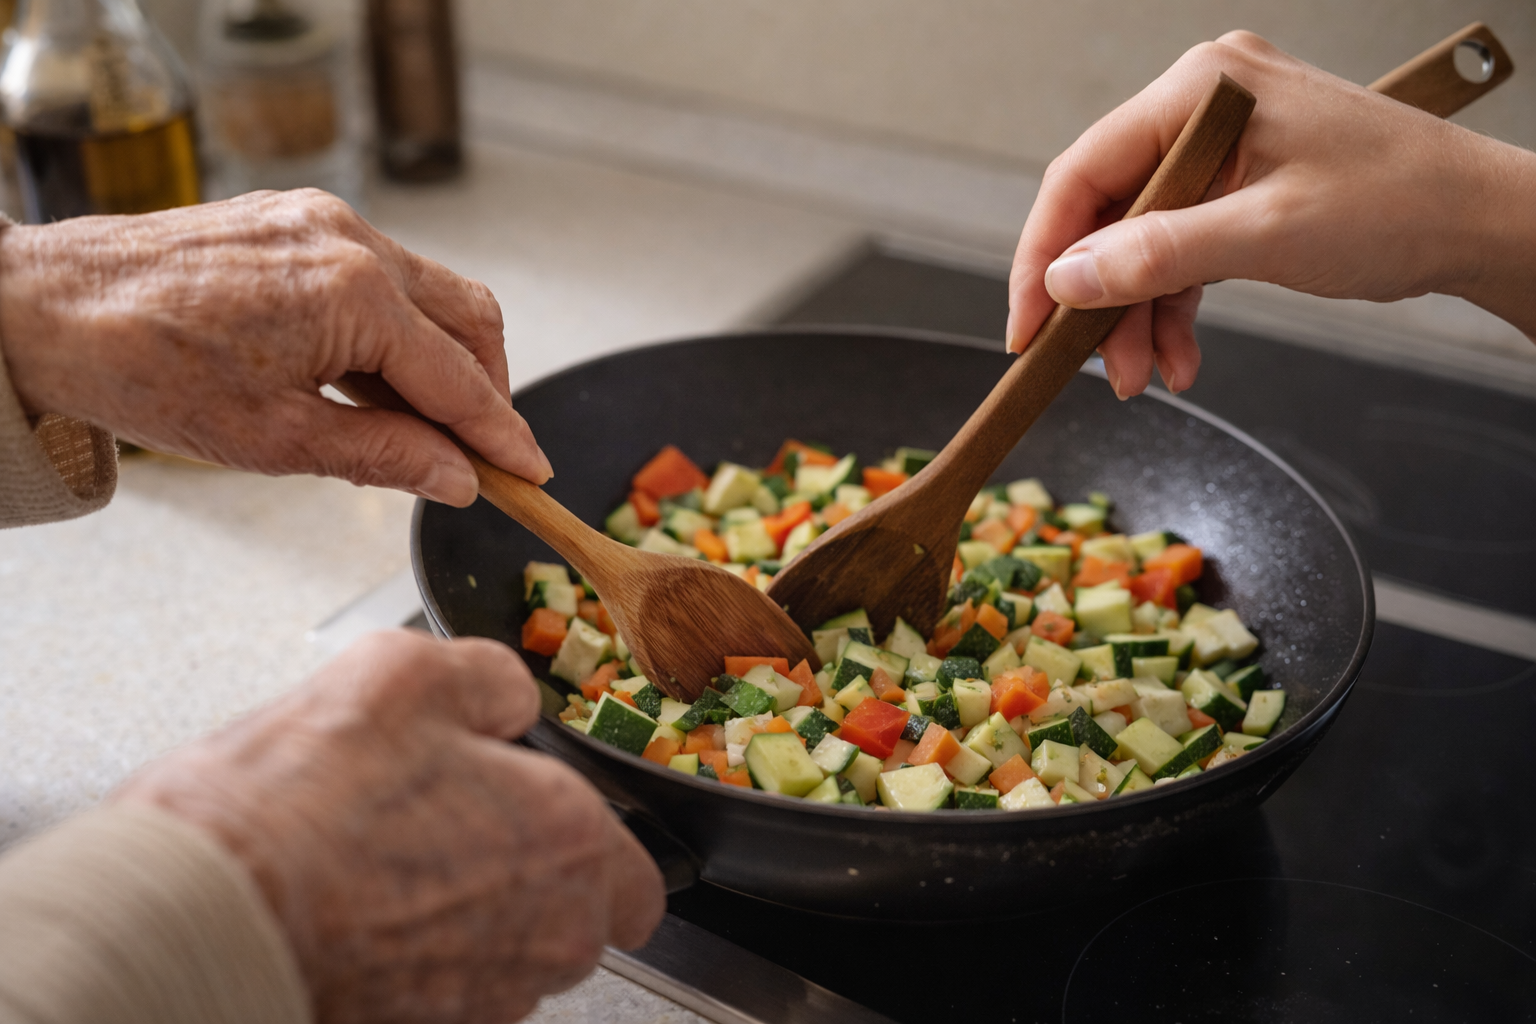
    There’s a certain kind of quiet that caregivers know well.

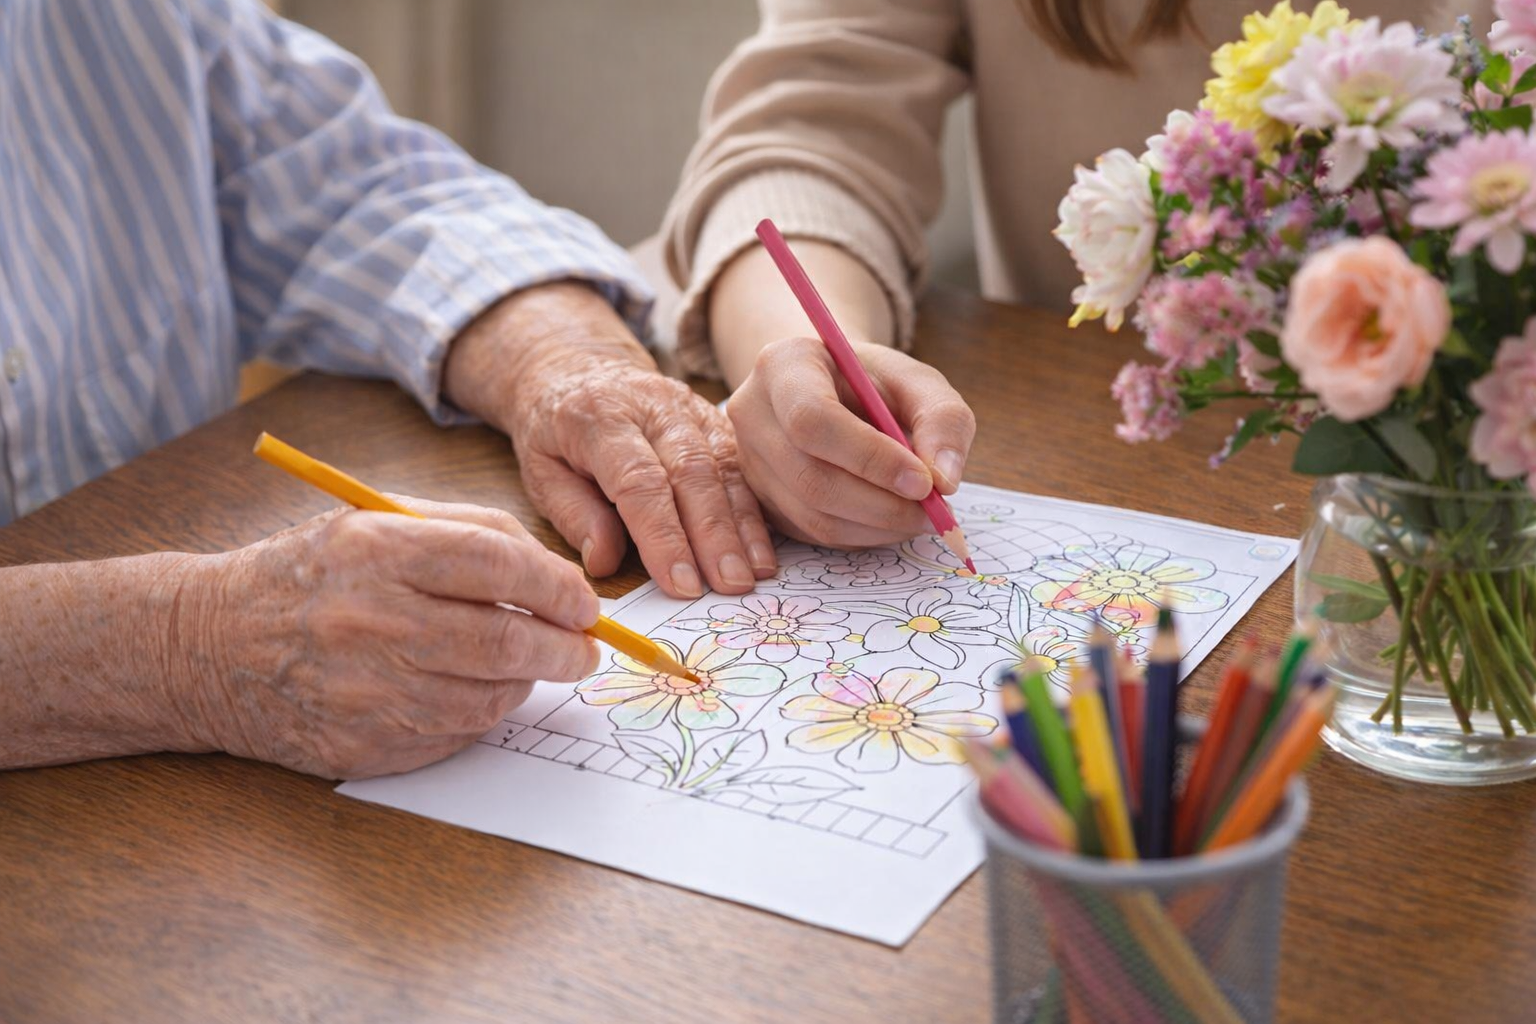
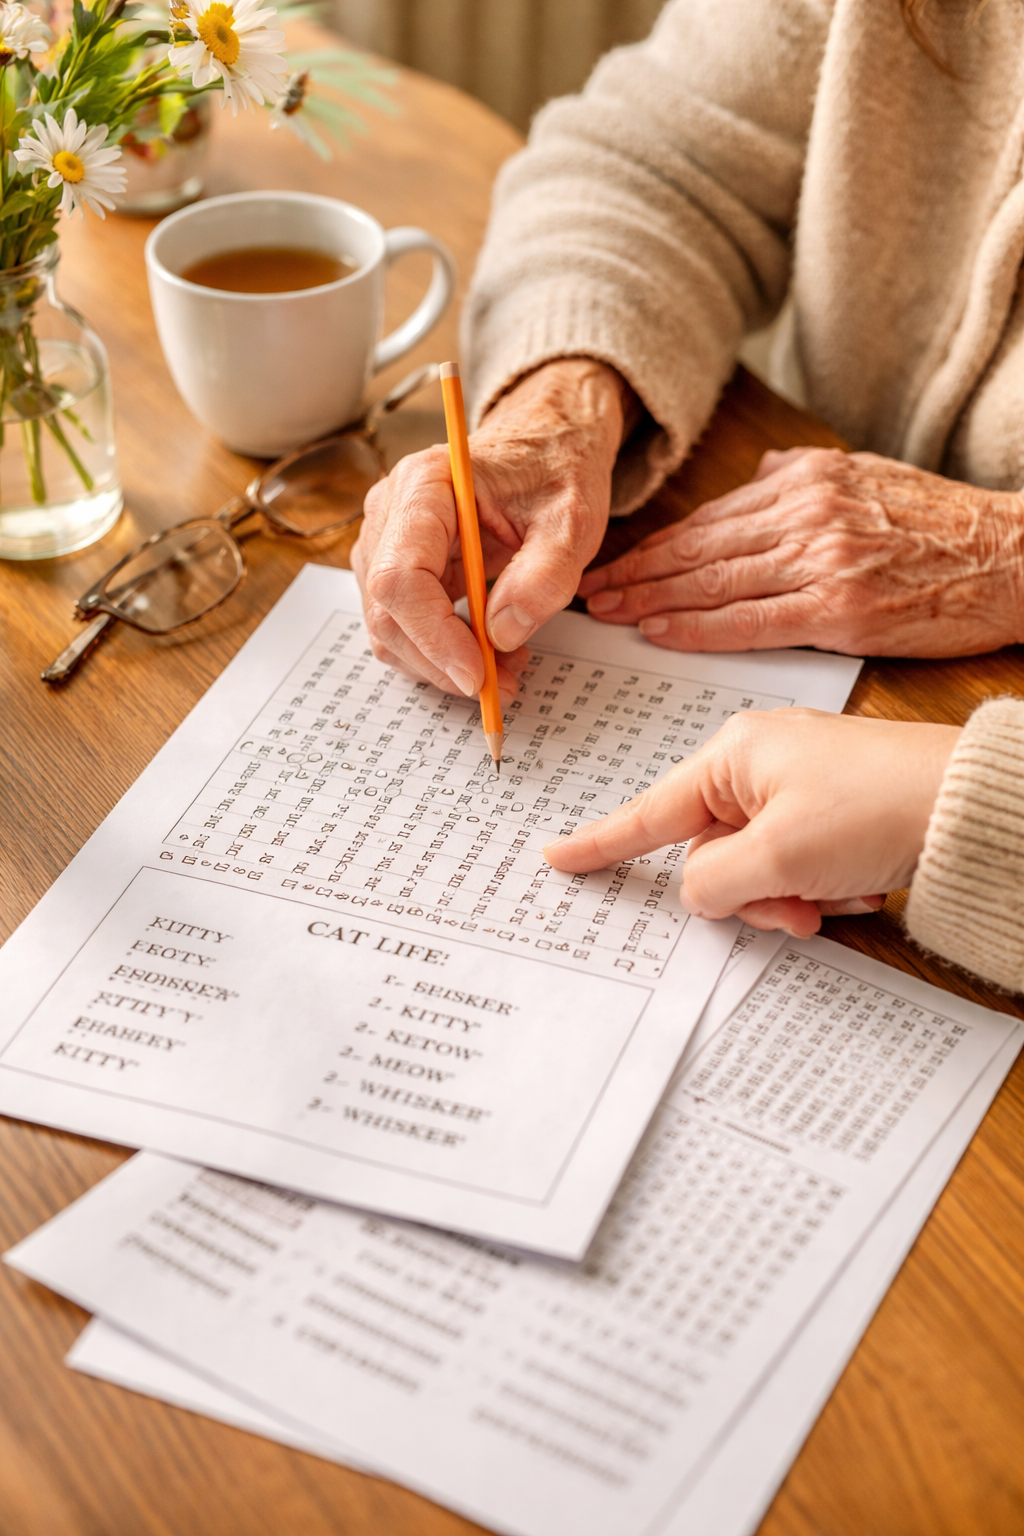
    Not the empty kind — the attentive, caring kind that happens when you’re sitting beside someone you love, sharing a moment that doesn’t ask too much. A cup of tea. A pencil. A page that feels simple and safe.

    This is personal for me. I’m a caregiver in more than one way — within my family and through my work. I’ve seen how quickly a day can feel heavy when we’re trying to “fill time” without over-stimulating, confusing, or tiring the person we’re caring for.

    And I’ve also seen how one gentle activity can change the mood of an entire afternoon: less pressure, more connection.

    That’s why I keep creating senior-friendly activities — not because we need to “fix” anyone, but because we all deserve moments that feel calm, dignified, and shared.


    Why word searches can be such a comforting activity

    Word searches are wonderfully low-pressure. There’s no timer, no right way to do it, and no need to “perform.” It’s simply looking for familiar words and letting the brain settle into a gentle rhythm.

    For many seniors — including those experiencing memory changes — word searches can offer:

    • A sense of success (finding even one word is a win)
    • A calming focus (the mind has something simple to do)
    • A small spark of memory (familiar words can unlock stories)
    • A shared moment (you can do it together without it feeling like “therapy”)

    Sometimes the best part is not the puzzle itself, but what happens while you’re doing it: a laugh, a remembered pet name, a “Oh! I see it!” moment.


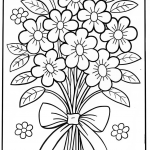
    A free 3-page printable to try together

    To make it easy to start, I created a small freebie you can download and print today:

    Free Printable: 1 Word Search Puzzle + Word List + Answer Key (3 pages)

    • Large print
    • Very easy
    • Senior-friendly layout
    • Perfect for a short, gentle activity session

    How to use it (no pressure, just connection):

    • Sit side-by-side and find the first word together
    • Take breaks whenever needed
    • Celebrate tiny wins (“You found it!” goes a long way)
    • If a word brings a memory, follow it gently — and if not, that’s okay too

    Tip: If the person you’re with tires easily, even 5–10 minutes can be “enough.” The goal isn’t finishing — it’s sharing time.


    Turning a worksheet into a small connection ritual

    A few simple ways to make this feel warm and meaningful:

    1. Do it with them, not for them
      “Shall we look for the first one together?”
    2. Invite stories without pushing
      If the theme is animals & pets, you can ask softly:
      “Did you ever have a pet like that?”
      If it doesn’t land, just move on.
    3. Keep the pace slow
      This is not about completing the page. It’s about a calm moment.
    4. Make it cozy
      Tea, soft light, quiet background music — the environment matters.

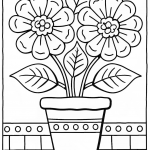
    If you’d like more: the full Animals & Pets set

    If the freebie feels like a good fit, I also made a full Animals & Pets Word Search set for seniors, designed in the same gentle style — large print, very easy, and caregiver-friendly.

    Full Version includes (60 pages total):

    • 20 word search puzzles
    • 20 matching word lists
    • 20 answer keys (solutions included)
    • Printable PDF in A4 + US Letter

    👉 See the full Animals & Pets Word Search set here:


    A soft reminder for caregivers

    You don’t need a “perfect” activity. You just need something that makes it easier to be together without pressure.

    Sometimes it’s a pencil, a page, and the quiet joy of finding a simple word side by side.


    Please note: This is a digital download. No physical item will be shipped.

  • The Container Graveyard: A Tiny Kitchen Reset That Changed Everything

    It’s winter. The world outside is wrapped in snow, and inside my kitchen… well. Inside my kitchen, a single drawer had quietly become a landfill with ambition.

    You know the one.
    The drawer where spatulas go to retire.
    Where mystery lids gather in little gangs.
    Where a whisk from 2014 still believes it has a purpose.

    Today I had a rare little pocket of time—just enough to cook something quickly and not start a whole “deep clean my entire life” project. So naturally I did the most reasonable thing:

    I opened the chaos drawer and chose violence.

    Step 1: Pull Everything Out (and pretend it’s fine)

    First rule of decluttering: it always looks worse before it looks better.
    Second rule: don’t panic when you find seven wooden spoons, one bottle opener, and an entire collection of plastic containers that have never once met their matching lid.

    I laid it all out on the counter like I was preparing evidence for a true crime documentary titled:
    “The Case of the Missing Tupperware Lids.”

    Step 2: The Keep / Donate / Goodbye Piles

    I made three piles:

    • Keep: the things I actually use
    • Maybe: the things I think I use (but mostly just feel guilty about)
    • Goodbye: duplicates, broken pieces, and the tools that only work if you have three hands and the patience of a saint

    I found:

    • a measuring cup with numbers worn off (✨a surprise every time✨)
    • a bent whisk
    • a lid that fit nothing—yet somehow felt emotionally attached to me

    Goodbye, friends. We had… some time together.

    Step 3: The Lid & Container Dating Show

    Then came the big event: matching lids to containers.

    It was basically speed dating:

    • “Do you fit?”
    • “No.”
    • “Do you fit?”
    • “Also no.”
    • “Do you fit?”
    • “Wait… oh my gosh. Is this… love??”

    I paired what I could and let go of the rest. If a lid didn’t have a matching container, it left. If a container had no lid, it left. No more “maybe I’ll find it someday” energy. I am not running a lost-and-found.

    Step 4: The Quick Wipe + Reset

    Once the drawer was empty, I did a fast wipe (nothing dramatic—just crumbs, dust, and whatever that sticky mystery spot was).
    Then I put things back with one simple rule:

    Most-used items in front. Everything else earns its place.

    Not a fancy organization system. No complicated dividers. Just… logic and mercy.

    Step 5: The Tiny “Kitchen Needs” List

    This is my favorite part because it saves future frustration.

    I made a quick list of:

    • what I tossed because it was broken
    • what I’m missing
    • what I keep borrowing from “other drawers” like a raccoon

    Nothing huge. Just a little note for later, so I don’t keep re-living the same small annoyances.

    The Result (and why it felt so good)

    In the end, it wasn’t a full kitchen makeover. It was one drawer. One small reset.

    But I swear… when the drawer slides closed without a fight?
    When the lids actually stack?
    When you’re not playing Jenga with measuring spoons?

    That’s a tiny win that makes the whole kitchen feel lighter.

    And honestly, in snowy winter days, I’ll take any “my life is slightly more together” moment I can get.

    Next time? We’ll tackle the pantry packets and the baking stuff—the flour bags, the sprinkles, the mysterious pudding powders.
    But for today, I’m calling this a victory.

    Because I matched the lids.
    And the lids… finally matched me back. 😄

  • Peach Crumb Bars with a Shortbread Base

    Buttery shortbread + jammy peaches + golden crumble… basically a hug in dessert form.

    If winter had a dessert personality, it would be something like this: warm, sweet, a little messy in the best way, and completely unfazed by the fact that it’s snowing outside. These peach crumb bars are my “I want something homemade but I also want to sit down soon” kind of treat.

    They’re simple, pantry-friendly, and forgiving. The base and topping are the same dough (bless), and the middle is just juicy peaches with a little help from sugar and spice. You get a buttery shortbread bottom, a soft fruit layer, and a crunchy crumble top that makes your kitchen smell like “someone has their life together.” (Even if you don’t. I don’t.)

    Why you’ll love these

    • One bowl-ish (because who wants more dishes?)
    • Same mixture for base + crumble topping
    • Works with fresh, frozen, or canned peaches
    • Cozy dessert energy that feels homemade without feeling complicated

    Ingredients (8–12 bars)

    For the crust + crumble

    • 2 ½ cups (310 g) all-purpose flour
    • ¾ cup (150 g) sugar
    • 1 tsp baking powder
    • ¼ tsp salt
    • 1 tsp ground cinnamon (optional, but cozy)
    • 1 cup (225 g) cold butter, cubed
    • 1 egg
    • 1 tsp vanilla extract (optional)

    For the peach filling

    • 3 cups peaches, sliced (fresh/frozen/canned*)
    • 2–3 tbsp sugar (adjust to taste)
    • 1 tbsp lemon juice
    • 1 tbsp cornstarch
    • ½ tsp cinnamon (optional)
    • Pinch of salt

    *If using canned peaches: drain well. If using frozen: thaw and drain excess liquid if very watery.


    Instructions

    1) Prep

    • Preheat oven to 350°F / 175°C
    • Line an 8×8 inch (20×20 cm) pan with parchment (or grease it well).

    2) Make the crust/crumble mixture

    In a bowl, mix flour, sugar, baking powder, salt, and cinnamon.
    Add cold butter and rub/cut it in until it looks like coarse crumbs.

    Add egg + vanilla and mix until it becomes a crumbly dough that holds together when squeezed.

    Set aside about 1 cup of the mixture for the topping.

    3) Press the crust

    Press the remaining dough firmly into the bottom of the pan.
    Bake for 10 minutes (this helps it stay nice and sturdy).

    4) Mix the filling

    Toss peaches with sugar, lemon juice, cornstarch, cinnamon, and salt.

    5) Assemble

    Spread peach filling over the warm crust.
    Sprinkle the reserved crumble evenly on top.

    6) Bake

    Bake for 35–45 minutes, until golden and bubbling at the edges.

    7) Cool (important!)

    Let it cool at least 1 hour before slicing—otherwise it will be delicious lava chaos.

    Dust with powdered sugar if you want them to look extra “bakery window.”


    Serving ideas (aka: choose your cozy level)

    • Warm bar + vanilla ice cream = elite winter comfort
    • Warm bar + plain yogurt = “I’m being responsible” dessert
    • Cold from the fridge = midnight snack energy

    Storage

    • Room temp: 1 day (covered)
    • Fridge: 4–5 days
    • Freezer: up to 2 months (wrap individually)

    Little note from my kitchen

    This is one of those recipes that makes the whole day feel softer. Even if it’s grey outside. Even if your to-do list is yelling. Even if you started the bake “just to use up fruit” and ended up eating the corner piece standing at the counter like a little kitchen gremlin. (No judgment. That’s tradition.)

    If you make these, tell me: team extra crumble or team extra fruit?

  • The “I’m Tired” Dinner: Creamy Garlic Chickpeas & Toast

    The “I’m Tired” Dinner: Creamy Garlic Chickpeas & Toast

    Some days call for a full-on cooking project… and some days call for a warm bowl of “please feed me quickly”. This is the second kind of day.
    This creamy garlic butter chickpea skillet is my cozy, minimal-effort dinner for nights when the snow is doing its dramatic thing outside and I’m doing my dramatic thing inside (mostly staring into the fridge like it might offer emotional support).

    Creamy Garlic Butter Chickpeas (15 minutes, one pan)

    What you’ll love

    • Pantry-friendly (hello, canned chickpeas!)
    • Comforting and creamy without being fussy
    • Ready in about 15 minutes
    • Works with toast, rice, pasta, or just a spoon

    Ingredients (serves 2)

    • 2 cans chickpeas, drained and rinsed
    • 2 tbsp butter (or olive oil)
    • 3–4 cloves garlic, minced
    • 1 tsp paprika (smoked if you have it)
    • 1/2 tsp dried thyme or Italian seasoning
    • Salt + black pepper
    • 1/2 cup cream (or half-and-half / oat cream)
    • 1–2 big handfuls spinach (optional but nice)
    • Squeeze of lemon (optional but highly recommended)
    • To serve: toasted bread, rice, pasta, or couscous
    • Optional toppings: chili flakes, grated parmesan, chopped parsley

    How to make it

    1. Warm the butter in a skillet over medium heat.
    2. Add garlic and cook 30–60 seconds until it smells amazing (don’t let it brown—garlic gets bitter when it’s having a bad day).
    3. Stir in paprika + thyme, then add chickpeas. Cook 3–4 minutes, stirring, until they’re hot and lightly coated.
    4. Pour in the cream and simmer 3–5 minutes until it turns glossy and slightly thick.
    5. Add spinach (if using) and let it wilt.
    6. Season with salt/pepper, then finish with a lemon squeeze for brightness.
    7. Serve over toast/rice/pasta. Eat immediately while it’s cozy and perfect.

    Quick variations

    • Tomato version: add 1–2 tbsp tomato paste with the garlic + spices.
    • Spicy version: chili flakes or a spoon of harissa.
    • “Protein boost”: stir in shredded rotisserie chicken or a fried egg on top.
    • No cream? Use a splash of milk + 1 tbsp cream cheese or a spoon of plain yogurt off-heat.

    Storage

    Keeps in the fridge for 2–3 days. Reheat gently with a splash of water/milk to loosen the sauce.

    Closing:
    If you make this, tell me what you served it with—toast, rice, pasta, or straight-from-the-pan-with-a-fork (no judgment, only admiration).

  • Cozy Winter Apple Crumble You Can Make in One Pan

    Cozy Winter Apple Crumble You Can Make in One Pan

    When the world outside looks like powdered sugar and the air hurts your face, I don’t want “fancy.” I want warm, cozy, and slightly dramatic—in the best way.

    This apple crumble is my favorite snow-day dessert because:

    • it smells like a hug (butter, cinnamon, vanilla… you know),
    • it’s forgiving (no perfect dough, no chilling, no stress),
    • and it comes out bubbling like it’s auditioning for a winter movie scene.

    Make it once and you’ll start hoping for “just one more snowy weekend.” (I’m not saying this dessert controls the weather… but I’m not not saying it either.)


    What you’ll love about this crumble

    • Warm + cozy: best served straight from the oven
    • Quick to prep: about 15 minutes of hands-on time
    • Very forgiving: swap fruits, spices, or nuts without ruining it
    • Photogenic: golden crumb + bubbling edges = instant “pin it” energy

    Ingredients (serves 4–6)

    Apple filling

    • 6 medium apples (about 900–1000 g / 2 lbs)
    • 2–3 tbsp brown sugar (or maple syrup)
    • 1 tbsp lemon juice
    • 1 tsp cinnamon
    • 1/2 tsp vanilla extract
    • 1 tbsp cornstarch (optional, helps thicken)
    • Pinch of salt
    • Optional: 1/4 tsp cardamom (highly recommended for that “winter magic” note)

    Crumble topping

    • 100 g (about 1/2 cup) butter
    • 120 g (1 cup) rolled oats
    • 100 g (3/4 cup) all-purpose flour
    • 80–100 g (1/2 cup) brown sugar
    • 1 tsp cinnamon
    • Pinch of salt
    • Optional: handful of chopped walnuts or pecans

    Instructions

    1) Heat the oven

    Preheat to 180°C / 350°F.

    2) Make the filling

    Peel (or don’t) and slice the apples. Toss with sugar, lemon juice, cinnamon, vanilla, salt, and cornstarch if using.
    Spread into a 10-inch oven-safe skillet or a medium baking dish.

    3) Brown the butter (tiny step, huge flavor)

    Melt butter in a small pan over medium heat until it turns golden and smells nutty (about 3–5 minutes).
    Take it off the heat right when you see brown bits at the bottom—don’t walk away. Butter is fast and dramatic.

    4) Make the crumble topping

    In a bowl, mix oats + flour + sugar + cinnamon + salt (and nuts if using).
    Pour in the browned butter and stir until you get chunky crumbs.

    5) Bake

    Scatter topping over apples. Bake 30–40 minutes, until the edges bubble and the top is golden.

    6) Serve (the important part)

    Let it cool 10 minutes (so you don’t burn your tongue like I always do).
    Serve warm with:

    • vanilla ice cream
    • whipped cream
    • or plain Greek yogurt if you want to feel “responsible.”

    Tips & Variations

    • Best apples: a mix of tart + sweet (Granny Smith + Gala, Braeburn, Honeycrisp, etc.)
    • No oats? Use extra flour + a bit of chopped nuts.
    • Want it extra cozy? Add a pinch of nutmeg or cloves.
    • Make-ahead: assemble, refrigerate, bake when needed (add 5–10 minutes).
    • Leftovers: keep covered in the fridge 3 days; reheat in oven or air fryer for crisp topping.

    A tiny “snow-day” serving idea

    Put the crumble on a plate, add a scoop of ice cream, and drizzle a little maple syrup.
    Then stand by the window, watch the snow, and pretend you’re the main character. This is non-negotiable.

  • A Tiny Herb Garden Indoors: 6 Easy Herbs You Can Start From Seed

    A Tiny Herb Garden Indoors: 6 Easy Herbs You Can Start From Seed

    When the garden season still feels “not yet,” I like to bring a little green inside. A tiny herb corner on the kitchen windowsill is one of those small rituals that quietly makes everyday life feel lighter—especially on busy, caregiver-style days when we need something simple that still feels nourishing.

    You don’t need a big setup. You just need a small pot, a bit of light, and a handful of seeds.

    6 easy herbs to grow (beginner-friendly)

    If you’re starting from seed, these tend to be the most forgiving:

    1. Basil – fast, joyful, smells like summer
    2. Parsley – steady grower, great for soups
    3. Chives – tiny but mighty, perfect on eggs
    4. Dill – lovely for potatoes + salads
    5. Coriander/Cilantro – best in multiple small sowings
    6. Mint – easy, but give it its own pot (it loves to spread)

    (Tip: If you want quick wins, start with basil + chives.)

    A simple windowsill setup (no-fuss list)

    Here’s the “keep it easy” version:

    • Small pots (or one longer planter)
    • Potting soil for herbs/seedlings
    • A tray to protect the windowsill
    • Plant labels (trust me—future you will thank you)
    • Optional: a small grow light if your window is dark

    Tiny tips that make a big difference

    • Light: most herbs want the brightest window you have.
    • Water: keep soil lightly moist—never soggy.
    • Thin seedlings: if too crowded, they grow weak. Keep the strongest ones.
    • Harvest gently: pinch off the top leaves to encourage bushy growth.

    Where I shop seeds + small garden supplies


    When I’m restocking seeds or grabbing small bits for an indoor herb corner, I usually shop here:

    Below are a few quick links to beginner-friendly herbs + the basics (seed trays, pots):

    A gentle finishing ritual

    Make a cup of tea, put on a calm playlist, and plant just one pot today. Tomorrow, plant the next.
    Small green moments count.

    Affiliate disclosure: Some links are affiliate links. If you use them, I may earn a small commission—at no extra cost to you. I only recommend products I’d use myself for a calm, simple home.

  • Caregiver Corner: 10 Easy Large-Print Recipes for Gentle Kitchen Days

    Caregiver Corner: 10 Easy Large-Print Recipes for Gentle Kitchen Days

    Some days, cooking is a joy.
    And some days… cooking is just another thing on a list that already feels too long.

    If you’re a caregiver (or you love someone who needs a bit of extra support), you probably know these “in-between” days. The days when you want something warm and familiar on the table — but you also want the process to feel calm, not complicated.

    I’m in that world too — both through my work and in my family — and I’ve learned something that sounds almost silly, but helps a lot:

    When the day feels heavy, small rituals matter.

    And in the kitchen, a small ritual can look like this:

    • one simple recipe
    • one page you can actually read
    • and a gentle pace that leaves room for conversation (or quiet)

    The problem with most recipes (especially on tired days)

    A lot of recipes are written for people who have:

    • perfect lighting
    • perfect energy
    • and perfect eyesight 😅

    But caregiver days aren’t like that.

    Tiny fonts, cluttered pages, long ingredient lists, “just sauté for 18 minutes while you simultaneously do three other things” — it’s not helping. Sometimes we need recipes that feel like a friendly hand, not a challenge.

    A gentle kitchen routine I use (15–30 minutes, no pressure)

    This is my favorite way to make cooking feel calmer — especially when someone is easily overwhelmed or distracted.

    1) Pick one familiar recipe

    Not a new experiment. Not a 12-step project. Just something simple and recognizable.

    2) Read it out loud (even if it feels weird)

    Reading the steps together slows everything down in a good way. It also turns cooking into a shared moment, not a performance.

    3) Set up like it’s “activity time,” not “work time”

    A cup of tea, a clean surface, a small bowl for scraps, and a gentle start.
    Sometimes just changing the vibe changes everything.

    4) Celebrate the smallest win

    Even if the meal is simple.
    Even if it’s not perfect.
    A warm plate on the table can be a big win.

    Why I made a large-print printable recipe set

    After enough caregiver days, I realized I wanted recipe pages that were:

    • easy to read
    • uncluttered
    • simple enough to follow without stress
    • and printable, so they can live in a folder on the kitchen counter

    So I made a small pack: 10 easy recipes in large print — clean layout, familiar ingredients, and simple steps.

    Want the printable?

    If you’d like the full set, you can find it here:
    👉

    Printing tip: It’s A4. If you print on US Letter, choose “Fit to page.”

    A quick idea: make it a “recipe binder”

    If you have a folder or binder at home, you can turn this into a tiny routine:

    • print the pages
    • add a cover
    • keep it somewhere visible
    • and let it become your “we always have something easy” backup plan

    Future-you will be grateful.

    A gentle note (because caregiver life is real life)

    If today is one of those days where everything feels like effort — you’re not failing. You’re carrying a lot.

    Start small. Make it simple.
    And if all you manage is tea and toast, that still counts as care.

  • A Little Garden Indoors: Gentle Coloring for Caregiver Days

    A Little Garden Indoors: Gentle Coloring for Caregiver Days

    Some seasons are made for muddy boots, fresh air, and “just one more thing” in the garden.
    And some seasons… are made for looking out the window, checking the forecast, and realizing that your garden dreams are still on hold for a while.

    If you’re a caregiver (or you love someone who needs a little extra support), you know those “in-between” seasons well. I’m in that world too — both in my work and in my family — and I’ve learned something simple: when the days feel heavy, small rituals matter.

    So until we can truly get back outside, here’s one gentle way to bring a little spring into the living room:

    a quiet cup of tea + one flower coloring page + 15 minutes of “no pressure.”

    No big setup. No complicated instructions. Just a small win.


    Why flowers work (even when energy doesn’t)

    Garden themes are familiar. They don’t feel childish, but they also don’t demand a lot. Flowers are “safe” conversation starters:

    • “Did you have flowers in your garden?”
    • “What was your favorite season?”
    • “Do you remember the smell of lilacs / roses / lavender?”

    Even if words are hard some days, a simple picture can still invite connection.

    And honestly? Sometimes the win is simply sitting side-by-side, sharing the same page, and letting the moment be enough.


    My tiny “Caregiver Corner” coloring ritual (15 minutes)

    Here’s the routine I keep coming back to:

    1. Set a timer for 10–15 minutes
      Short is good. “We can stop anytime” is even better.
    2. Choose one page only
      One page = one activity. Easy to start, easy to finish.
    3. Pick just 1–3 colors
      No need to plan a masterpiece. One color is still a win.
    4. Let it be messy, imperfect, and relaxing
      The goal is calm — not perfection.

    If you’re doing this with someone else, try coloring one small section together (a petal, a leaf, a corner). It turns the page into a shared moment.


    A couple of printing & comfort tips (that actually help)

    • Bold outlines + lots of white space are easier on tired eyes.
    • Try thicker pencils or markers if gripping is difficult.
    • If you print on US Letter but your file is A4, use “Fit to page.”
    • If markers bleed through, print on slightly thicker paper or test one page first.

    Freebie: 2 gentle flower coloring pages (download)

    I wanted to make it easy to try this ritual right away, so here are two free printable flower coloring pages from my Gentle Garden set:

    Freebie: 2 gentle flower coloring pages (PDF)

    Click the link below to download the clean, printable 2-page PDF (A4). Tip: choose “Fit to page” if you print on US Letter.

    Tip: Save them in a folder called “Caregiver Corner – Quick Wins.” Future you will be grateful.


    Want the full set?

    If you’d like more pages in the same simple, calming style, I also made a printable pack with 20 flower coloring pages (bold outlines, uncluttered layout, black & white for easy printing):

    👉 Gentle Garden Flower Coloring Pages (Printable PDF)

    It’s designed to be quick to use — print one page, enjoy the moment, repeat whenever you need it.


    One last thing (from one caregiver heart to another)

    If today feels like a lot: you’re not failing because you can’t do everything.
    Sometimes care looks like big things… and sometimes it looks like a warm drink and a single flower on paper.

    Either way, it counts.

  • Homemade Egg Noodles for Cold Days (Our No-Water, No-Salt Comfort Staple)

    It’s properly cold outside—the kind of cold that makes the whole world feel a little quieter. The windows look frosty, the kitchen feels like the warmest place on earth, and suddenly all we want is soup. Not the fancy kind. The kind that steams up your glasses and makes you sigh on purpose.

    So we did what we always do when winter gets personal: we made noodles.

    This is one of our absolute favorites—thin, delicate cérnametélt (Hungarian-style fine egg noodles). We almost always cook it straight into soup, where it turns a simple broth into something that feels like home.

    And the best part? It’s just eggs and flour. No salt. No water. No shortcuts. Just a dough that takes its time—like we do on days like this.


    The Cozy Noodle We Always Make for Soup

    If you grew up with chicken soup and homemade noodles (or you just wish you had), this is your sign. These noodles are light but comforting, and because they dry well, you can make a big batch and keep it for weeks.

    We make ours the old-fashioned way:

    • mixed by hand
    • rested for at least an hour
    • rolled out with a machine
    • dried slowly for days in a cool room

    It’s not fast. But it’s deeply satisfying.


    Ingredients (Big Batch)

    • 10 eggs
    • 1 kg all-purpose flour (plus a little extra for dusting)

    That’s it.

    No salt. No water.
    The eggs do all the work here. (And in soup, you can season the broth properly—so the noodles stay gentle and neutral, like they’re meant to be.)


    How We Make Cérnametélt (Step-by-Step)

    1) Make the dough (by hand)

    We tip the flour onto the counter (or into a very large bowl), make a well, and crack in the eggs.

    Then we mix slowly at first—pulling flour in from the edges—until it turns into a shaggy, stubborn dough. And yes… it’s stubborn. At first it looks like it will never come together.

    But it does. You just keep kneading.

    I knead by hand until it’s firm, smooth, and elastic—and then a bit more. This dough should feel strong and dense, not soft.

    2) Rest (minimum 1 hour)

    Once the dough is kneaded, we cover it (bowl, cloth, wrap—whatever you like) and let it rest for at least an hour.

    This rest is non-negotiable.
    It relaxes the gluten and makes rolling so much easier later. It also feels like the dough is exhaling.

    3) Roll it out (with a machine)

    After resting, we cut the dough into manageable pieces and run it through the pasta machine.

    We start thick, fold it a few times, then gradually go thinner. For cérnametélt we aim for thin sheets—delicate, but not paper-thin.

    4) Cut into fine noodles

    Then we cut it into thin strands (the “thread noodle” look). If your cutter does wider noodles, you can still use them—but the fine ones are magic in soup.

    5) Dry slowly (for days)

    Here’s our winter method: we dry the noodles in a cool room, because honestly, our house is basically a drying room in winter.

    We spread the noodles out (or drape them) and let them dry for several days before storing.

    This matters:

    • If you pack them too early, they can get slightly soft or clump.
    • Fully dried noodles store beautifully and stay separate.

    6) Store in a box

    Once they feel completely dry—crisp and breakable—we transfer them to a box or container and keep them in the pantry.


    How We Cook It (Straight Into Soup)

    Most of the time, we cook these noodles directly in simmering soup for just a few minutes—until tender. Because they’re egg-rich, they cook quickly.

    If you’re making broth, this is the moment where everything turns into comfort food.


    Notes From Our Kitchen

    • No salt in the dough: we prefer seasoning the soup instead. The noodles stay soft and gentle.
    • No water: eggs are enough—and it helps the noodles dry and store well.
    • Drying time depends on your room: if it’s warm or humid, it may take longer. In winter, it’s perfect.

    A Little Winter Ritual

    This is one of those quiet, old-fashioned kitchen rituals that makes the cold feel less annoying. You’re not just cooking—you’re stocking up on comfort. You’re making future-you very happy.

    And honestly? When the noodles are drying on the counter and the house smells like soup, winter doesn’t feel quite so rude.

    If you make this, I hope it becomes one of your cozy staples too.

  • A Cozy Winter Ritual: Homemade Tea from My Pantry Shelves

    A Cozy Winter Ritual: Homemade Tea from My Pantry Shelves

    Today is one of those days when the cold feels personal. ❄️
    The kind of cold that makes you walk past the window, sigh dramatically, and immediately start looking for something warm—preferably in a mug.

    So I did what I always do on days like this: I went to the pantry shelves and pulled out my little jars of home-dried tea ingredients. It’s one of my favorite winter rituals—like a tiny reminder that summer still exists… somewhere.


    What we brewed today

    A cozy mix of whatever felt right in the moment:

    • Rosehip (tart, bright, and vitamin-y)
    • Chamomile (soft, calming, basically a warm blanket)
    • Mint (fresh and comforting)
    • Sloe / blackthorn berries (deep, slightly wild, and very “winter woodland”)


    How we make it (the lazy, happy way)

    I’m not precious about tea. I’m here for comfort.

    My simple method:

    1. Add a spoonful (or two) of each ingredient to a teapot or heatproof jar
    2. Pour over hot water
    3. Let it steep until it smells like you deserve peace
    4. Strain, pour, and pretend you are in a cozy novel

    Optional but recommended: honey.


    Why I love drying my own tea ingredients

    It feels like a small act of seasonal magic:

    • you collect little gifts from summer
    • dry them slowly
    • and in winter you get to open a jar and taste a memory

    Also, it makes me feel wildly prepared. Even if the rest of my life is… less organized. 😄


    Coming soon

    If you’d like, I can write a more detailed post later about:

    • how I dry and store tea ingredients
    • what blends I make most often
    • and which ones are my “winter essentials”

    For now, I’m just grateful for warm mugs, quiet afternoons, and the fact that my pantry shelves are basically a tiny tea library.


    Your turn

    What’s your go-to winter tea? And do you like it floral, fruity, minty… or “strong enough to restart my soul”? ☕️😄